Getting Started
To write C++ you need two things: a compiler — the program that turns the C++ you type into an executable, a file your computer can actually run — and somewhere to write and run your code. This course uses CLion, an IDE (Integrated Development Environment: the application you write, build, run, and debug code in). CLion comes with everything you need bundled in, so setup is short.
This page gets you from nothing to a running "Hello, World!". JetBrains' Quick Start Guide shows the same steps with screenshots if you would like to follow along visually.
1. Install CLion
- Download CLion from jetbrains.com/clion and run the installer with the default options.
- CLion is free for non-commercial use — coursework included. The first time it launches it will ask you to sign in; create a free JetBrains account, and when prompted choose the non-commercial licence. (Students and teachers can alternatively apply for the educational programme, which also covers other JetBrains tools, but for this course the non-commercial licence is enough.)
CLion also bundles CMake (the build tool the course uses), so you do not need to install that separately. The only piece that depends on your operating system is the compiler — click the tab for your OS:
Nothing is strictly required. CLion provides a MinGW toolchain and sets it up on first launch — accept the default it offers, and everything in this book will build. (If the toolchain list ever comes up empty, the If something went wrong section at the bottom shows how to add MinGW.)
Recommended anyway: Microsoft's MSVC compiler. MSVC is the native Windows toolchain — the compiler Windows software is normally built with, the one third-party libraries ship Windows binaries for, and the one this course uses. You do not need the Visual Studio IDE: on the Visual Studio downloads page, scroll to Tools for Visual Studio and download Build Tools for Visual Studio — the compiler and libraries on their own. (Free for students and individual use under the Community licence.)
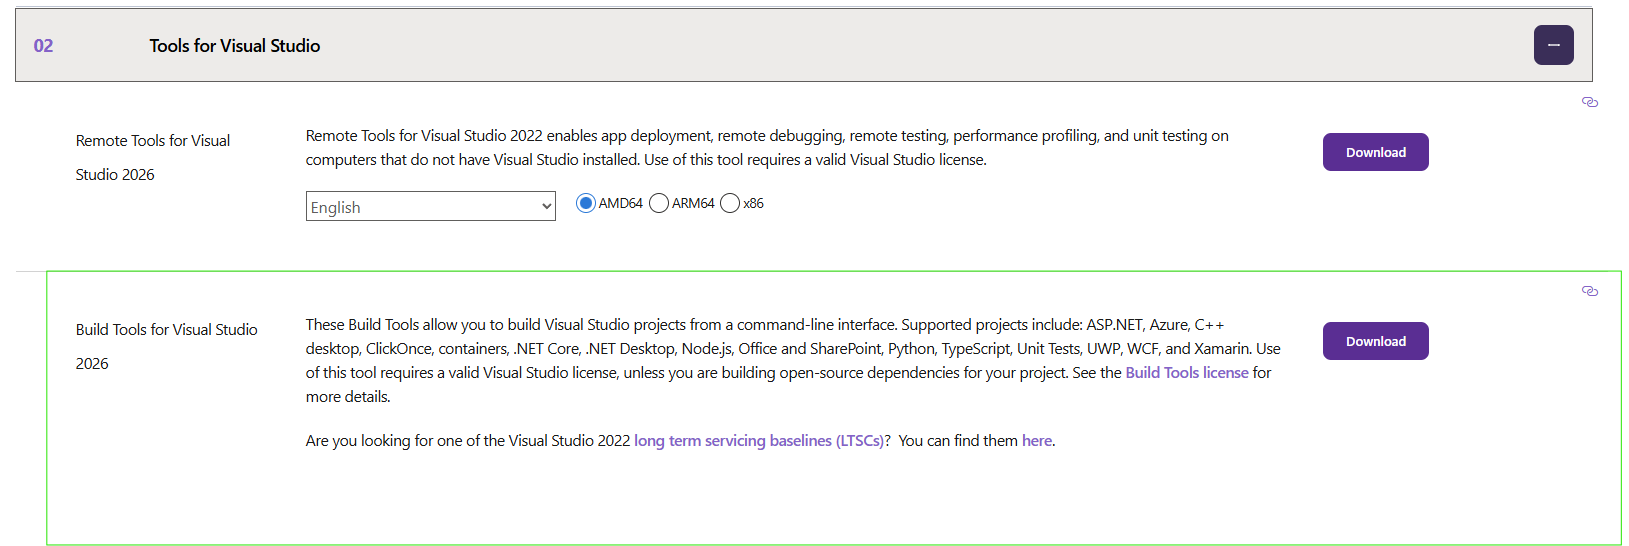
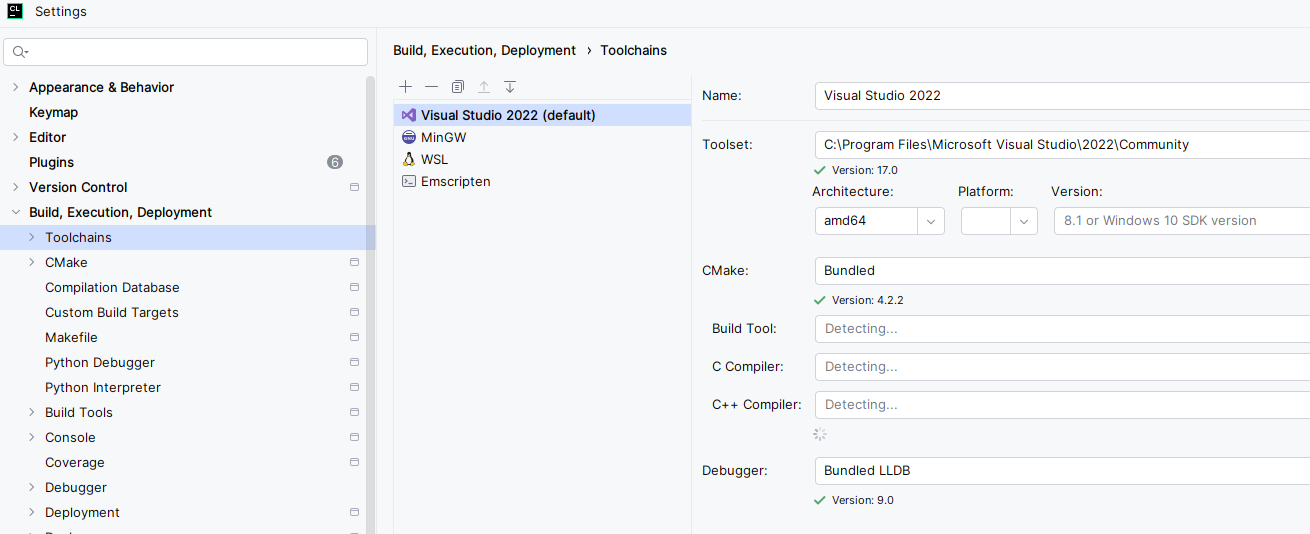
In the installer, tick the Desktop development with C++ workload. CLion picks the toolchain up by itself; you can see it, and choose which one is the default, under File → Settings → Build, Execution, Deployment → Toolchains.
Install Apple's command-line developer tools, which include the Clang compiler. Open the Terminal app and run:
Follow the prompt. CLion then detects the compiler automatically.
2. Create your first project
- On the welcome screen choose New Project (or File → New Project if CLion is already open).
- Select C++ Executable.
- If the dialog offers a Language standard option, choose C++20. (Not every version does — either way, once the project opens, check that its
CMakeLists.txthasset(CMAKE_CXX_STANDARD 20); if the line shows a lower number like14or17, change it to20.) - Choose a location for the project — but read the warning below first — and click Create.
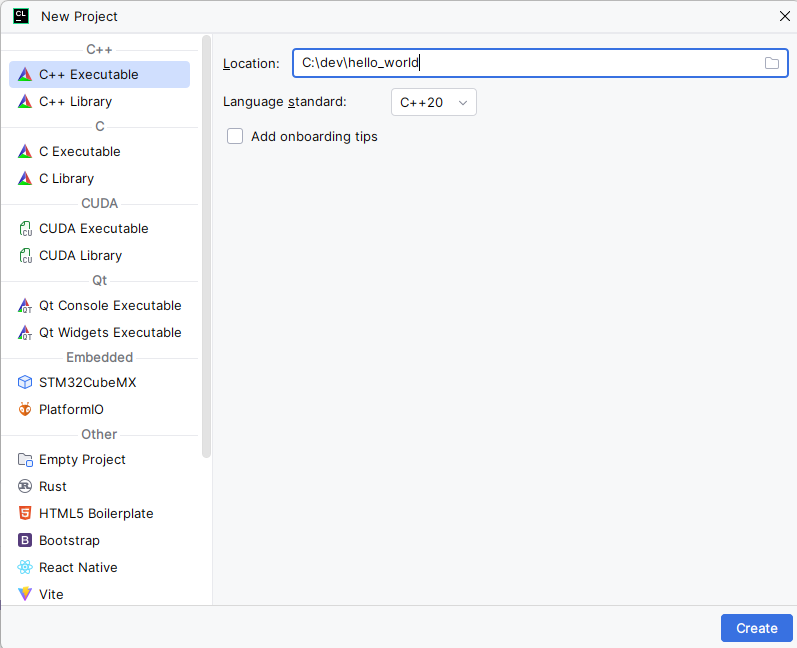
Where to put your project. Avoid a folder inside cloud storage (OneDrive, Dropbox, Google Drive). Building generates a large number of files that would sync constantly, and if you use more than one PC the machine-specific build files cause conflicts. Also avoid paths with spaces or special characters — including Norwegian
æ,ø,å— which cause confusing errors on Windows. A simple path such asC:\dev\projectsis ideal. (Computer Basics explains why paths, spaces, and special characters matter.)
CLion creates a starter "Hello, World!" project for you, with two files:
# CMakeLists.txt — tells the build tool how to build your program
cmake_minimum_required(VERSION 3.20)
project(demo)

set(CMAKE_CXX_STANDARD 20)

add_executable(demo main.cpp)
// main.cpp — your program
#include <iostream>

int main() {
    std::cout << "Hello, World!" << std::endl;
    return 0;
}
Do not worry about what each line means yet — Basic Structure breaks the program down piece by piece, and CMake Introduction covers the CMakeLists.txt. (CLion generates std::endl; this book usually writes "\n" instead. Both end the line — the difference does not matter yet.)
3. Build and run
C++ has to be compiled into an executable before it can run. CLion does both with one click:
- Click the green ▶ Run button near the top-right corner (or press Shift+F10 on Windows/Linux, Ctrl+R on macOS).
- The hammer icon next to it builds without running, if you ever want that.

4. Check it worked
The Run tool window opens at the bottom of CLion and should show something like:
exit code 0 means the program ran successfully. If you see that, your setup is working and you are ready for the Introduction.
If something went wrong
The most common first-run problems:
-
"No toolchain configured" or the compiler is not found. Open File → Settings → Build, Execution, Deployment → Toolchains. On Windows there should be a bundled MinGW entry; if it is missing, click + and add it. On macOS/Linux, make sure you installed the compiler from the tab in Step 1.
 - A red error appears in the CMake panel at the bottom. This is almost always a bad project location — a path with spaces or special characters, or a cloud-storage folder. Delete the project and recreate it in a simple path like
 C:\dev\projects. - The Run button is greyed out or nothing happens. CLion is probably still loading the project — wait for the progress bar at the bottom to finish, then try again. - Still stuck on an error message. Read Reading Compiler Errors, then copy the exact error text into a search engine — or into an AI assistant, following Using AI for Coding.