Version Control with Git
Version control is the system that lets you take snapshots of your project as it evolves: every time you reach a working state, you save it. If you break something later, you can return to the snapshot. If you work with others, version control coordinates everyone's changes so they do not overwrite each other.
The tool you will use for this — in this course, in your degree, and in industry — is Git.
This chapter introduces the concepts, walks through the commands you need on day one, and then shows where the same operations live in CLion — which is where you will do most of your daily git work.
The concepts
A repository (or "repo") is your project plus its complete history of changes. It lives in a .git/ folder at the root of the project; you never look inside it directly. The repo is a self-contained timeline.
A commit is one snapshot. Each commit records:
- the full state of the project at that moment (git stores the complete snapshot, not a list of edits — the "what changed" you see in
git diffis worked out on demand by comparing two snapshots), - a message describing the change (written by you),
- a unique identifier (a 40-character hash),
- the commit that came before it (its "parent").
A branch is a line of development. The first branch is conventionally called main, though a plain git init still names it master unless you have told git otherwise — run git config --global init.defaultBranch main once and every new repo starts on main. You can create new branches to work on a feature without disturbing main, then merge your work back when it is ready.
A remote is a copy of your repo on another machine (usually GitHub). You push your commits up to the remote to share them; you pull to get commits others have pushed.
That is the whole model. Repo, commits, branches, remotes.
Configuring git (once per machine)
Before your first commit, tell git who you are. This information goes into every commit you make:
--global means "for every git repo on this machine." Set it once, forget it.
A typical first day with a repo
The commands below are the ones you will type ten times a day. Get comfortable with them.
Starting a new project
Saving your work (a commit)
git add CMakeLists.txt main.cpp     # stage these files for the next commit
git status                          # check what is staged
git commit -m "Initial Hello World" # record a snapshot with a message
git add does not save anything yet; it just marks files for inclusion. git commit is the snapshot. The -m flag attaches a short message.
Write commit messages that explain why you made the change, not just what changed. "Fix off-by-one in motor PID loop" is far more useful three months later than "fix bug" or "update file."
To see the history:
Working with a remote (GitHub)
For the remote you will use GitHub — in this course and, most likely, for the rest of your career. If you do not have an account yet, sign up at github.com (any email works; you can add your NTNU address later for student benefits).
Set up SSH access (once per machine)
When your computer talks to GitHub, it has to prove who you are. In this course we use SSH keys for that: a pair of files — a private key that never leaves your machine, and a public key you hand to GitHub. Set it up once and every clone, push, and pull afterwards just works, with no passwords or login prompts, in the terminal and in CLion alike. The setup is four short steps; do them slowly and in order.
1. Generate the key pair. Open a terminal (on Windows, PowerShell — or the Terminal tab at the bottom of CLion) and run:
It asks where to save the key and for a passphrase — press Enter at every prompt to accept the defaults. This creates two files in the hidden .ssh folder inside your home folder:
id_ed25519— the private key. Never share it, never commit it, never paste it anywhere.id_ed25519.pub— the public key. This is the one GitHub gets (.pubas in public).
2. Copy the public key. Put the contents of the .pub file on your clipboard:
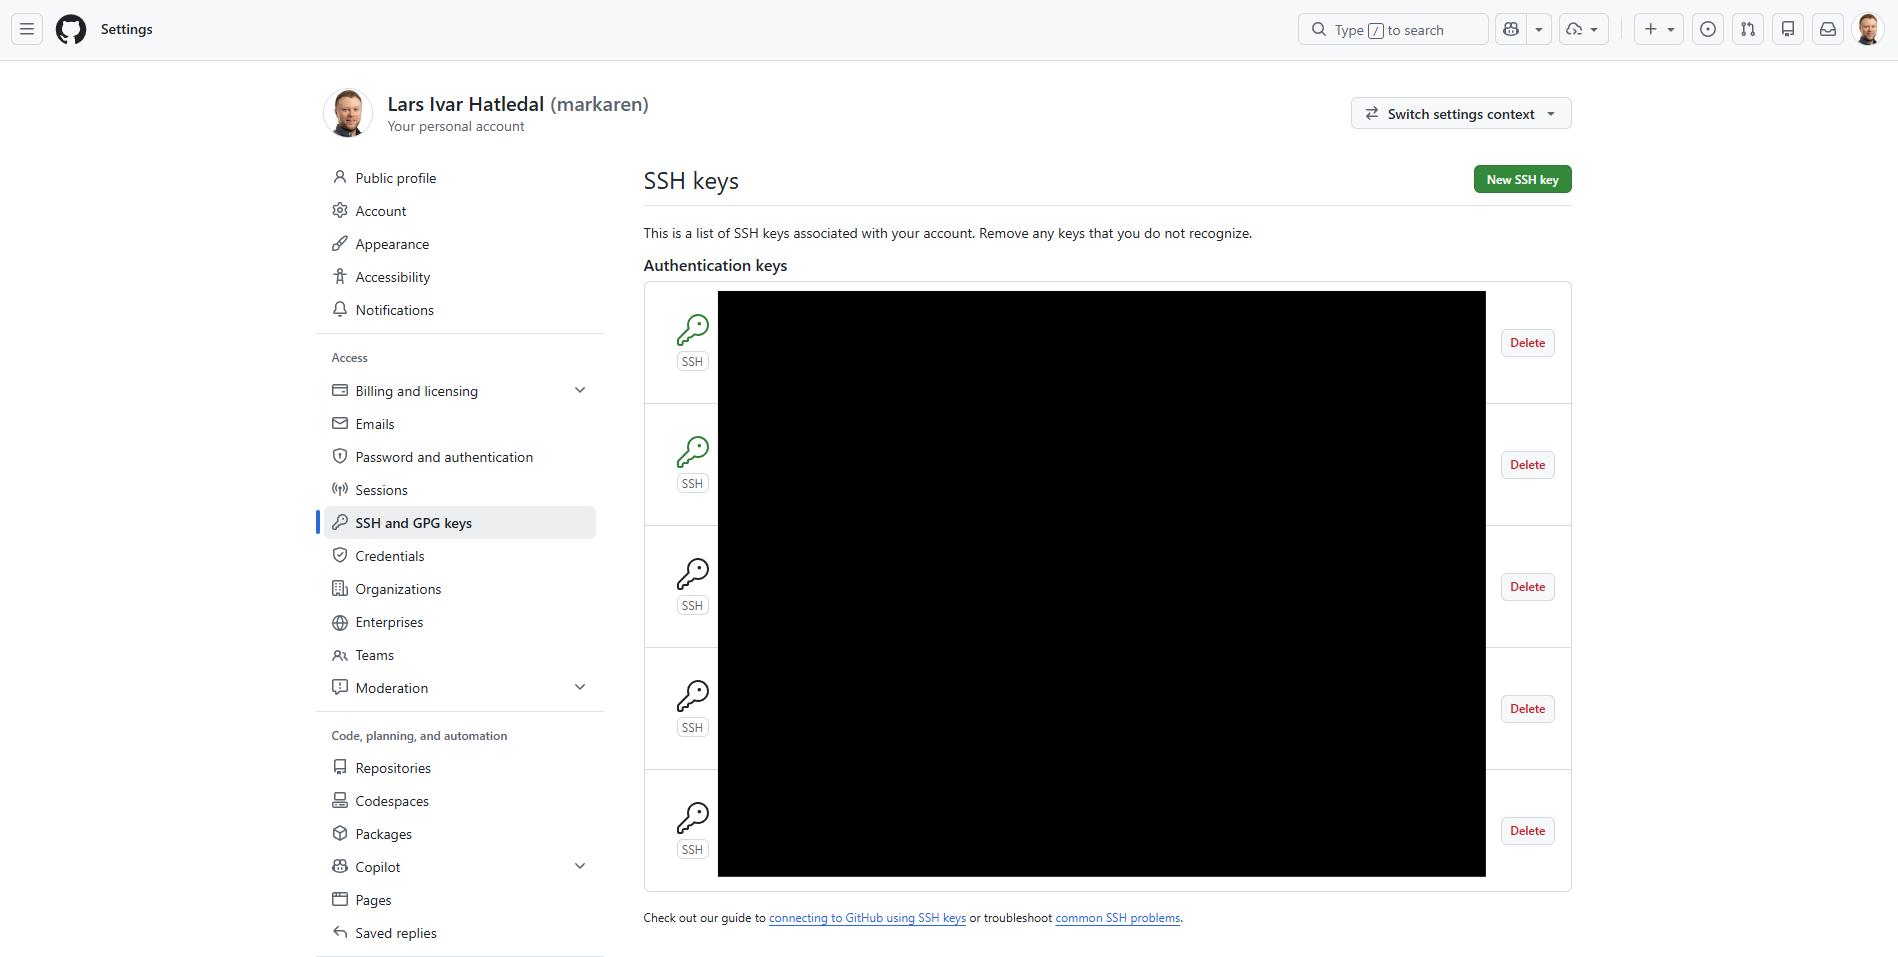
3. Give it to GitHub. On github.com, click your profile picture (top right) → Settings → SSH and GPG keys → New SSH key. Paste the key into the Key field, give it a title like "NTNU laptop", and click Add SSH key.
4. Test it. Back in the terminal:
The very first time, SSH asks whether it should trust GitHub ("The authenticity of host 'github.com' can't be established") — type yes and press Enter. Success looks like:
That last part is normal — it means everything works.
The two mistakes everyone makes
- Pasting the wrong key. GitHub gets the
.pubfile, nothing else. If GitHub rejects the key or a red warning appears, check you did not paste the private key. Permission denied (publickey). This error, on clone or push, means GitHub does not have your key: either step 3 was skipped, or you are on a different machine than the one that generated the key. Each machine you work on needs its own run through these steps.
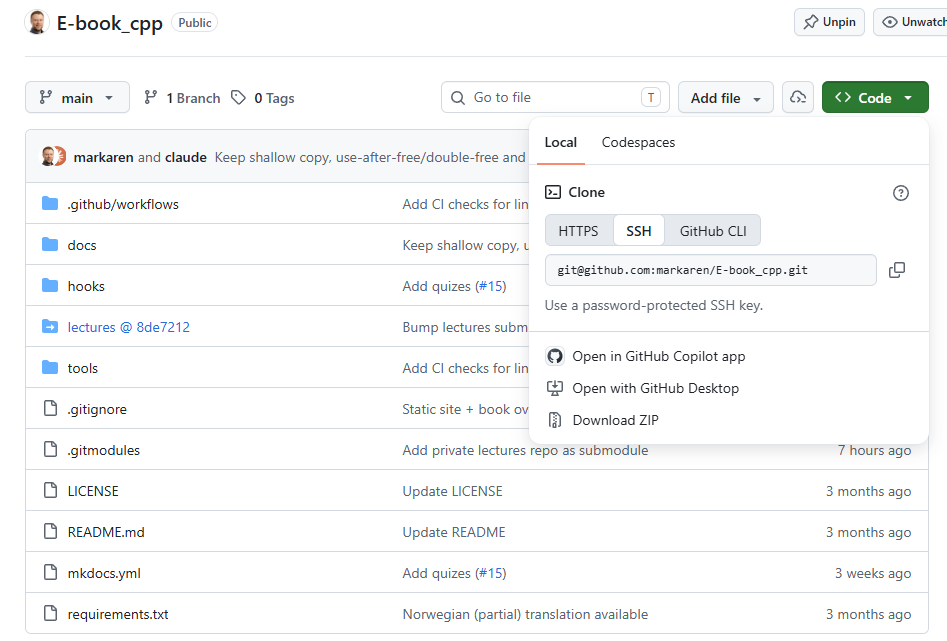
From now on, whenever you copy a repo's address from GitHub's green Code button, use the SSH tab — the URL looks like git@github.com:owner/repo.git. (You will also see HTTPS URLs, https://github.com/...; they work too, with a browser login instead of a key, but in this course we standardise on SSH.)
There are two ways your local repo and a GitHub repo first meet.
If the project already lives on GitHub, clone it:
git clone git@github.com:owner/repo.git   # download the repo from GitHub
cd repo
# make changes, git add, git commit ...
git push                                   # send your commits back to GitHub
git pull                                   # fetch and merge others' commits
If you started locally with git init (the flow above) and now want it on GitHub, create an empty repository on GitHub, then connect and push:
git remote add origin git@github.com:owner/repo.git   # name the remote "origin"
git push -u origin main                                # push main and remember the link
git remote add origin <url> tells your local repo where its GitHub copy lives (origin is the conventional name for it). The -u on that first push sets main to track origin/main, so from then on a plain git push and git pull know where to go. Because your SSH key already proves who you are, the push goes through without any login prompt.
Either way, git clone or the remote add + first push is what you run once to start; push and pull are what you do repeatedly to stay in sync.
Branching
When you start a new feature or experiment, do it on a new branch:
git switch -c new-controller-tuning   # create + switch to a new branch
# ... make commits ...
git switch main                       # go back to main
git merge new-controller-tuning       # bring the branch's commits into main
That sequence looks like this — work forks off main, gathers its own commits, then merges back:
%%{init: {'gitGraph': {'showCommitLabel': false}, 'themeVariables': {'git0': '#3f51b5', 'git1': '#26a69a', 'gitBranchLabel0': '#ffffff', 'gitBranchLabel1': '#ffffff'}}}%%
gitGraph
    commit
    commit
    branch new-controller-tuning
    commit
    commit
    checkout main
merge new-controller-tuning(git switch is the modern, clearer command. The older git checkout does the same thing and you will see it in tutorials.)
If you regret a branch, just throw it away:
Branches are cheap. Make one for every feature, experiment, or attempt.
When merge says CONFLICT
If two branches changed the same lines, git merge stops and reports a conflict. Git marks the clash inside the file with three lines of markers:
<<<<<<< HEAD
your version of the lines
=======
the other branch's version
>>>>>>> new-controller-tuning
Open the file, delete the markers, and leave the text you want (yours, theirs, or a blend of both). Then git add <file> to mark it resolved and git commit to finish the merge. git status lists every file still in conflict.
Tags: naming a commit
A tag is a permanent name for one commit. A branch moves along with every new commit; a tag stays put. It marks "this is the state at that moment": the version you handed in, a release, the point where a feature first worked.
Use an annotated tag, which carries a message and a date of its own:
git tag -a part1-done -m "Part 1 works: window, box, rig. Next: plug in the simulation."
git push --tags      # a plain git push does not send tags
git tag lists your tags, and git show part1-done shows the message and the commit it points to. Write the message like a good commit message, only a little longer: what works now, what was hard, what comes next. Months later, git log tells you what changed; the tags tell you where you were.
In CLion: Git → New Tag... — give it a name and a message (the message is what makes it annotated). To send tags to GitHub, tick Push Tags in the push dialog. Tags appear as labels in the Git tool window's Log tab.
Pull requests
A pull request (PR, sometimes "merge request") is GitHub's way of asking "please review and merge my branch into main." You push your branch to GitHub, click "Create pull request," and your teammates can read the change, comment, and approve before the merge happens.
You will not always use PRs on solo projects. You will use them constantly in any team setting. The mechanics:
- Create a branch, commit your changes, and push the branch to GitHub. A brand-new branch has no remote counterpart yet, so the first push must name one:
git push -u origin new-controller-tuning. (A baregit pushfails here with "no upstream branch" — the-ucreates the upstream and remembers it, so later pushes on this branch are justgit push.) - Open a pull request from that branch to
main. The easiest way: right after you push, open the repo on github.com — a yellow banner with a Compare & pull request button appears. Click it, write a short description of the change, and click Create pull request. - Wait for review; address feedback by pushing additional commits to the same branch.
- Once approved, merge the PR.
Git in CLion
Everything above works in any terminal, and you should be able to do it there — when git behaves strangely, the terminal is where you find out what is actually going on. Day to day, though, you will mostly use git through CLion, which has every operation from this chapter built into its interface. Nothing new to learn: CLion runs the exact same git commands for you, and the vocabulary — commit, push, pull, branch — is identical.
Connecting CLion to your GitHub account (optional)
Your SSH key is all git needs: clone, push and pull work in CLion exactly as they do in the terminal, without CLion knowing anything about your GitHub account.
Signing the IDE in to GitHub as well is a convenience, not a requirement. It buys you three things — CLion can list your own repositories when cloning, create a repository for you, and open pull requests from the IDE — at the cost of authorising JetBrains' integration on your GitHub account. Plenty of developers decline that and lose nothing; this chapter never assumes you did it.
If you want it: File → Settings → Version Control → GitHub (on macOS: CLion → Settings) → + → Log In via GitHub, authorise in the browser that opens, and tick Clone git repositories using ssh so the integration uses the key you already made.
Install the Modal Commit Interface plugin (once)
Recent CLion versions commit through a non-modal Commit tool window docked in the sidebar. This course uses the older modal commit dialog instead: one focused window holding the file list, the diff and the message together, so a commit is a single deliberate act rather than something spread across the editor. It is a plugin now, and worth installing on day one:
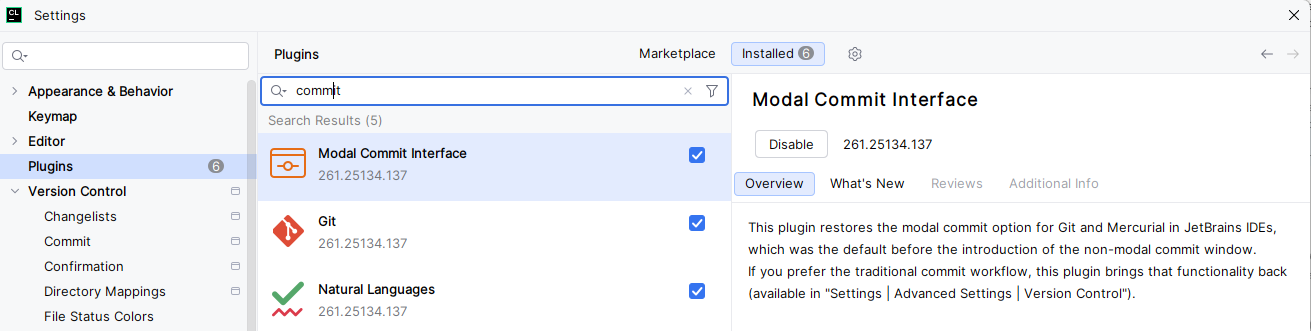
- Open File → Settings → Plugins, choose the Marketplace tab, and search for
commit. - Install Modal Commit Interface and restart CLion when it asks.
- Switch the modal interface on under File → Settings → Advanced Settings → Version Control.
From then on Ctrl+K (⌘K on macOS) opens the commit dialog, and the rest of this chapter assumes it. If you skip the plugin, everything below still works — it just happens in the docked tool window instead.
Getting a project
- Clone from GitHub: on the welcome screen choose Clone Repository (or File → New → Project from Version Control with a project open) and paste the repository's SSH URL — the one from the green Code button's SSH tab. (If you signed the IDE in to GitHub, your own repositories are also listed for picking.)
- Put a local project on GitHub: create an empty repository on github.com, then connect and push it exactly as above:
git remote add origin git@github.com:owner/repo.gitfollowed bygit push -u origin main. Both commands work from CLion's Terminal tab. (With the IDE signed in to GitHub you can instead use Git → GitHub → Share Project on GitHub, which creates the repository and pushes in one step.)
The daily cycle
- Commit: press Ctrl+K (⌘K on macOS) to open the commit dialog. Ticking a file's checkbox is
git add; click a file to see exactly what changed in it. Write a message and press Commit — or Commit and Push... to share it in the same step. - Push: Git → Push (Ctrl+Shift+K).
- Pull: Git → Update Project (Ctrl+T).
- Branches: click the branch name in the toolbar (or the status bar at the bottom right). From there you can create a New Branch or switch to an existing one — CLion's version of
git switch. - History: the Git tool window's Log tab is a clickable
git log, showing the commit graph with every branch.
| Terminal | In CLion |
|---|---|
git clone <url> |
Welcome screen → Clone Repository |
git add + git commit |
Commit dialog (Ctrl+K): tick files, write message, Commit |
git push |
Git → Push |
git pull |
Git → Update Project |
git switch -c <name> |
Branch name in toolbar → New Branch |
git merge <branch> |
Branch name in toolbar → pick branch → Merge into Current |
git tag -a <name> -m "..." |
Git → New Tag...; tick Push Tags when pushing |
git log |
Git tool window → Log tab |
git diff |
Click a file in the commit dialog |
"Add file to Git?"
When you create a new file, CLion asks whether to add it to git. Say Add for anything you wrote — source files, CMakeLists.txt, headers. Say Cancel for generated files; better yet, keep a proper .gitignore (see below) and CLion will stop asking about them entirely.
Merge conflicts, the comfortable way
When a merge hits a conflict, CLion opens a Conflicts dialog listing the affected files. Click Merge on a file and you get a three-way view: your version on the left, the incoming version on the right, and the result you are building in the middle. Accept a side's change with the >>/<< arrows, discard one with ×, or edit the middle pane directly, then click Apply. It is the same conflict resolution as editing the <<<<<<< markers by hand — just far harder to get wrong.
When the GUI confuses you
CLion has a Terminal tab at the bottom. Whatever state the buttons have gotten you into, git status there tells you the truth, in the same terms as this chapter.
Common commands at a glance
| Command | Purpose |
|---|---|
git init |
Create a new repo in the current folder |
git clone <url> |
Download an existing repo |
git status |
What has changed; what is staged |
git add <file> |
Stage a file for the next commit |
git commit -m "..." |
Record the staged changes as a snapshot |
git log |
Show commit history |
git diff |
Show unstaged changes |
git diff --staged |
Show staged but uncommitted changes |
git push |
Send commits to the remote |
git pull |
Fetch and merge commits from the remote |
git switch -c <name> |
Create and switch to a new branch |
git switch <name> |
Switch to an existing branch |
git merge <branch> |
Merge another branch into the current one |
git branch |
List branches |
git tag -a <name> -m "..." |
Give the current commit a permanent name and a message |
git push --tags |
Send your tags to the remote |
When something goes wrong
Three situations every student hits in their first month.
"I changed a file but I didn't mean to."
This one does delete
git restore throws away your uncommitted changes to that file for good — they were never committed, so there is no snapshot to recover them from. This is the exception to "almost nothing is truly deleted" below: that safety net only covers work you have already committed. Be sure you want the changes gone before you run it.
"I staged a file but I didn't mean to."
"My last commit had a typo in the message."
(Only amend a commit you have not yet pushed. Once it is shared, leave it alone.)
For everything else (merge conflicts, lost work, "what happened?") the answer is almost always:
Git is forgiving by default. Almost nothing is truly deleted until you explicitly run a destructive command.
What to put in .gitignore
A .gitignore file lists files and folders that git should never track. For a typical CMake project:
Never commit build outputs, IDE settings, or credentials. The repo should contain only source — what you wrote and need to share.
Further reading
Git has more depth than fits in one chapter. The single best free resource is the official Git Book (git-scm.com/book); chapters 2 and 3 cover the day-to-day workflow in detail.
Summary
- A repo is a project plus its history. A commit is one snapshot.
- Stage with
git add, save withgit commit, share withgit push, sync withgit pull. - Use branches for everything; they are free.
- Write commit messages that explain why, not just what.
- Set up your SSH key once per machine and give the
.pubfile to GitHub; after that every push and pull just works, in the terminal and in CLion. - CLion has all of this built in: commit, push, pull and branch from the IDE, authenticated by the same SSH key. Signing the IDE in to your GitHub account is optional convenience on top.
- When in doubt:
git status,git log.